Photo by Rubaitul Azad on Unsplash
Operating MySQL within a Docker container and configuring it with DBeaver.
What is Docker:
Docker is a popular tool for making and using containers, which are like little safe spaces for software. You put your software and all the stuff it needs inside, and it runs without messing up anything else. With Docker, you can easily use your software in different places.
What is MySQL?
MySQL is a well-liked type of database. When you run MySQL inside a Docker container, it means your database is kept separate from your other software. This can be helpful because you can manage and change your database separately from the rest of your program. You can also use something called Kubernetes to make sure your MySQL works well, even if your other parts of the program change a lot.
Using containers helps keep things the same. Once you finish making your program, you can put it in containers and send it to the internet without needing to set up MySQL every time on different computers.
In this tutorial I’ll show you how to containerize a MySQL in a Docker container and how to configure the DBeaver interface in a windows machine.
Prerequisites:
· Install Docker: https://docs.docker.com/engine/install/
· Create a Docker Hub account.
· Install DBeaver: https://dbeaver.io/download/
Follow the following steps.
1. Start your docker application and make sure it running. Open your terminal and execute the following command.
docker run - name mysql_db -d -p 3307:3306 -e MYSQL_ROOT_PASSWORD=root mysql:8
Let me explain what the command does:
· mysql_db: name of container
· -p 3307:3306: “-p” flag enables port forwarding; it indicates the ports of communication between your computer with the docker container. “3307” is a port in your computer that will listen in “3306” of docker container.
· MYSQL_ROOT_PASSWORD=root: my password. Feel free to change to your preferred password.
· Mysql:8: image downloaded of MySQL.
This command launches a container running MySQL 8, setting the root user password manually, and uses the -d flag to keep the container running in the background even after you close your terminal.
After installation you can close the terminal.
2. Configure DBeaver.
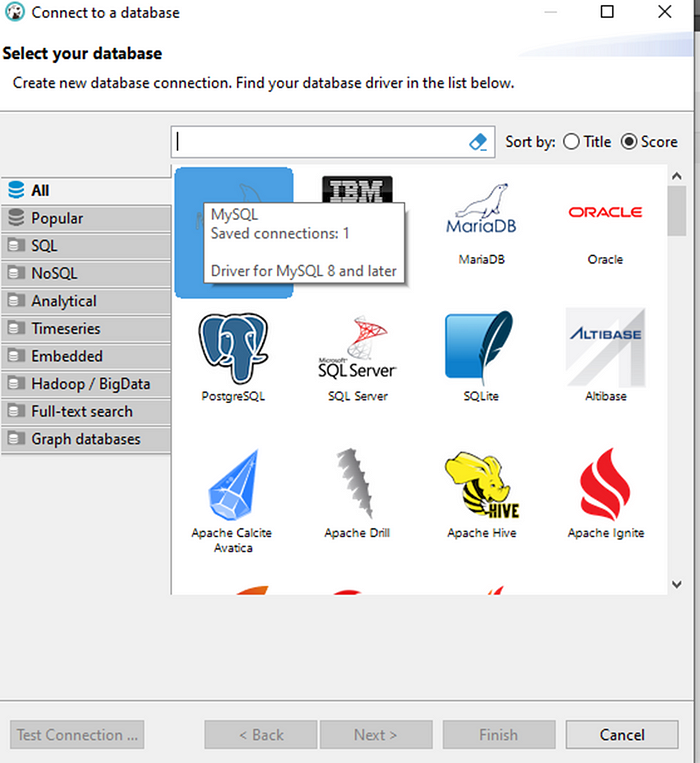
Launch DBeaver and navigate to the “Database” menu. Click on “New Database Connection” and select MySQL from the list of available databases.

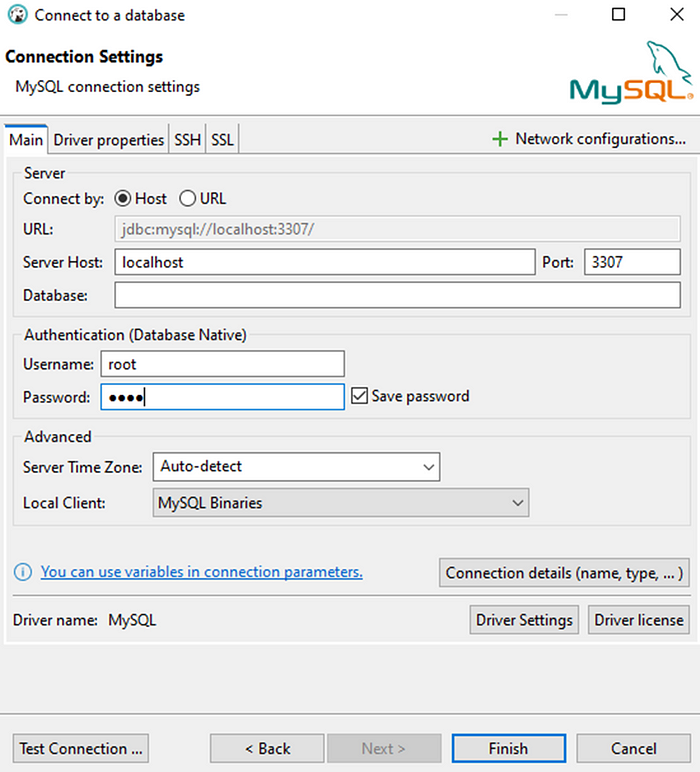
Enter the connection details, including the host (localhost if MySQL is running locally), port (default is 3306 change it to 3307), username (root), and password (specified during MySQL container setup in our case root).

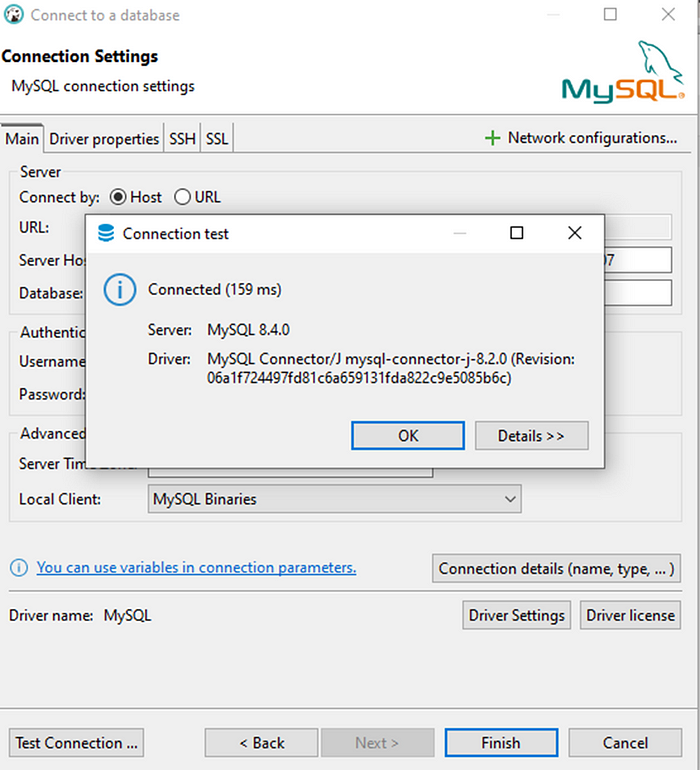
Once the connection details are entered, click “Test Connection” to ensure successful connectivity with the MySQL database.

If you get this message, then the connection is successful
With the connection established, you can now explore the MySQL database structure, execute queries, manage tables, and perform various administrative tasks using DBeaver’s user-friendly interface.
Conclusion
Utilizing Docker containers for running MySQL databases, coupled with powerful tools like DBeaver, offers developers a flexible and efficient solution for managing database systems. By leveraging the isolation, portability, and scalability of Docker containers alongside the intuitive interface of DBeaver, organizations can streamline database operations and focus on delivering innovative solutions without being encumbered by infrastructure complexities.
